Opening
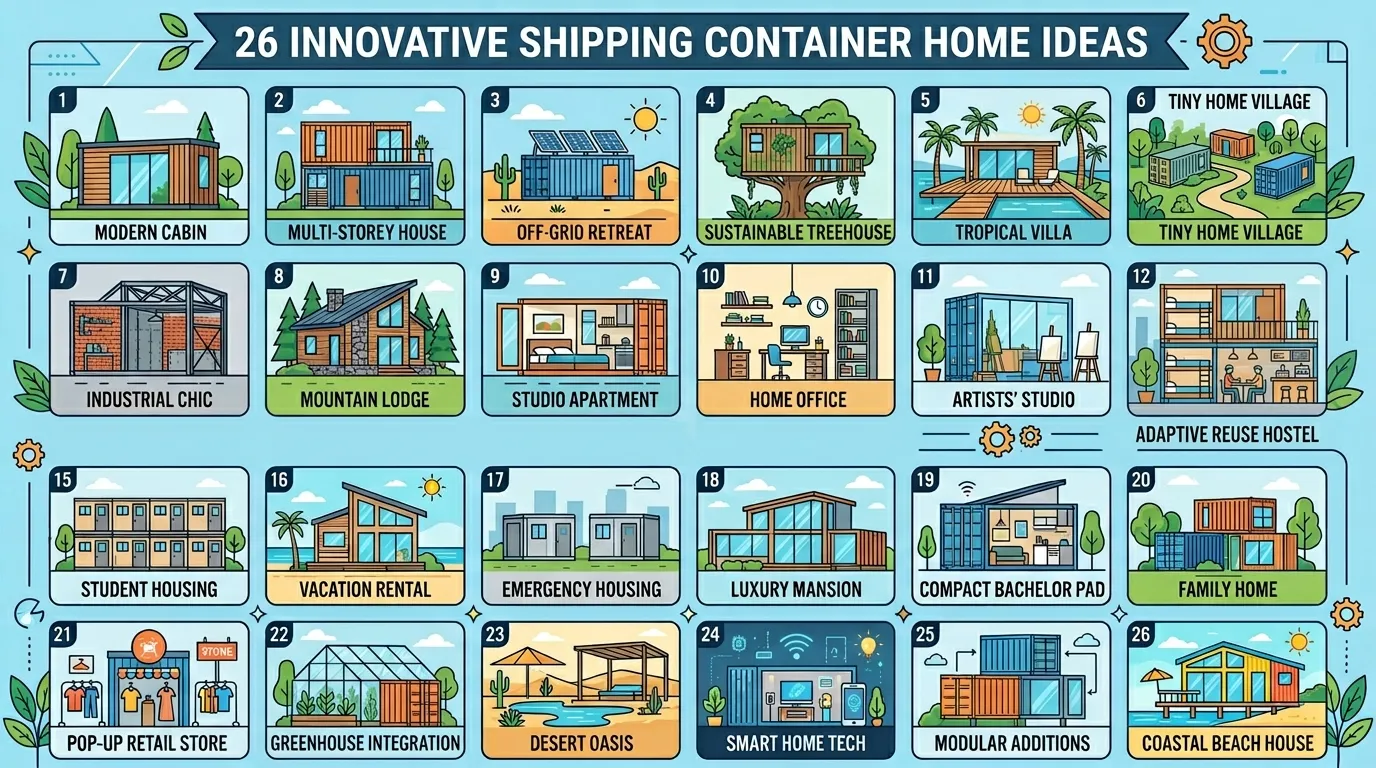
A shipping container home is a residential structure built from reclaimed or new steel cargo containers, adapted into livable spaces with innovative architecture and sustainable design. This article delivers 26 shipping container homes ideas—from minimalist single-container studios to sprawling multi-unit compounds—that prove industrial materials can shelter you beautifully.
Shipping container architecture feels like honest living: raw steel and exposed beams, clean lines and authentic materials, the satisfaction of seeing structure as statement. There’s a quiet confidence in claiming industrial remnants as shelter, a deliberate rejection of wasteful building. The movement spans from desert homesteads to urban infill, from off-grid escapes to statement-making architectural projects. Here are 26 ideas worth saving—and stealing.
Why Shipping Container Homes Work So Well
Shipping container homes represent a convergence of sustainable architecture, industrial design aesthetics, and practical necessity. Originating from the architect Phillip Clark’s 1987 concept and popularized in the 2000s by designers seeking affordable, eco-conscious building, container architecture borrows from both minimalism and brutalist movements—celebrating materials in their functional, unadorned state. What distinguishes container homes from other sustainable builds is their modular nature: each container is identical, load-bearing, and engineered. This creates a design language where repetition becomes intentional, where constraint breeds creativity.
Core materials are uncompromising: corten steel (weathering to a rust patina), corrugated metal panels, reclaimed wood, concrete, and industrial glass. Colors emerge from this palette—warm rust tones, charcoal grays, deep blacks, and the silver-gray of bare steel, accented with cedar siding, white trim, or polished concrete floors. Textural variety comes from metal aging, wood grain, and exposed fasteners. These materials age visibly and beautifully, resisting the false perfection of conventional building.
Container homes trend now because they answer three modern needs simultaneously: affordability (a used 40-foot container costs $2,000–$3,500), sustainability (reclaimed materials, minimal waste), and the desire for small, intentional living. Post-pandemic, homeowners rejected sprawl for compact, purposeful design. The aesthetic aligns with millennial preferences for authenticity and visible craftsmanship—people want to see the structure holding them up.
Small spaces don’t just work in container design—they’re the design’s native language. A single 40-foot container (320 sq ft) or even two 20-foot containers stacked create enough space for full living if height is utilized, lofted sleeping areas are integrated, and storage is ruthless. Larger compounds (3–6 containers) achieve family-scale living. The limitation—headroom in single containers (typically 7’6″)—can be solved by stacking, installing skylights, or selecting taller high-cube containers (9’6″).
| Element | Core Trait 1 | Core Trait 2 |
| Philosophy | Sustainable reuse, architectural honesty | Modular flexibility, industrial minimalism |
| Key Materials | Corten steel, corrugated metal, reclaimed wood | Concrete, industrial glass, steel fasteners |
| Key Colors | Warm rust, charcoal gray, weathered steel | Deep black, white trim, natural wood tones |
26 Shipping Container Homes Ideas
1. The Desert Minimalist — Single Container with Courtyard

Vibe: Still and grounded, where absence becomes presence.
Why it works: The courtyard anchors a single container by extending its living space outdoors—negative space becomes part of the design vocabulary rather than a limitation. The window-wall trades privacy for light and visual connection to landscape, a principle borrowed from Japanese architecture. One large opening (12 ft × 8 ft sliding glass) costs less than multiple small windows and multiplies perceived space by 40%.
How to get it: Commission a custom oversized sliding glass door system (standard is 8′ × 8′; request 12′ wide). Frame the exterior of the container with 2×12 pressure-treated wood and pea gravel to define courtyard boundary. Keep interior furnishings to five pieces maximum—this forces ruthless curation and makes the space feel intentional, not empty.
💡 Quick Win: Paint or stain the courtyard perimeter posts cedar-red to warm the industrial exterior—costs under $200 and makes the container feel grounded in landscape rather than dropped on it.
Shop The Look
- Stainless steel industrial sliding glass door hardware kit
- Polished concrete floor sealer matte finish
- Charcoal steel twin loft bed frame
- Natural wool area rug 8×10 neutral minimalist
- Industrial ceramic cylinder vase neutral
- Steel and glass coffee table minimalist
- Reclaimed wood accent shelf wall-mounted
- Potted agave plant ceramic pot
- Wool herringbone throw blanket cream
- Edison bulb pendant light fixture industrial
2. Layered Wood Cladding — Reclaimed Siding Exterior

Vibe: Warm and authentically weathered, like a structure that’s earned its place.
Why it works: Reclaimed wood cladding disguises the industrial container completely while adding textural richness and warmth. Random-width planks (4–12 inches) layered horizontally create rhythm and disguise the container’s rigid geometry. The varying grain, color, and patina from genuine reclaimed wood signals authenticity and sustainability—this material has a history visible in every plank.
How to get it: Source reclaimed barn wood from salvage yards (typically $3–8/board foot). Install over 2×4 pressure-treated furring strips attached to the container’s steel frame at 16-inch intervals. Stagger plank widths and leave 1/16-inch gaps for natural wood movement. Expect 40-foot container = 1,200–1,400 board feet ≈ $4,500–$8,000 material cost.
How to get it: Paint the window frames and roof trim a deep charcoal gray—this defines architectural edges and prevents the structure from reading as one undifferentiated mass of wood.
Shop The Look
- Reclaimed mixed barn wood cladding boards random width
- Pressure-treated 2×4 lumber furring strips
- Galvanized steel exterior fasteners 3-inch
- Deep charcoal metal window frame kit industrial
- Galvanized metal roof panels standing seam
- Weathered wood stain cedar-gray exterior
- Black metal gutter system residential
- Reclaimed wood interior sliding barn door 36×84
- Potted aloe plant terracotta pot
- Climbing jasmine plant climbing vine
3. Double-Height Glass Wall — Interior Light Maximization

Vibe: Luminous and permeable, where inside and outside dissolve.
Why it works: A double-height glass wall (16 ft tall, 40 ft wide for a standard container) transforms a 320-square-foot enclosed box into a space that feels twice its size through visual extension. The principle—transparency instead of partition—borrows from Japanese open-plan design and modernist architecture. Frameless glass with minimal aluminum mullion (the vertical supports) reduces visual obstruction to barely 2 inches per panel.
How to get it: Specify high-performance commercial-grade glass (triple-glazed, argon-filled for insulation, low-E coating for temperature control). Cost: $150–$250/sq ft installed. For a 40-ft × 8-ft wall, budget $48,000–$80,000. This is a significant investment but eliminates the need for interior lighting during daylight hours and multiplies perceived living area.
💡 Quick Win: If full-height glazing exceeds budget, install glass from 3 feet up to 8 feet tall—still creates transparency and light while leaving the lower wall available for storage or thermal mass.
Shop The Look
- Frameless floor-to-ceiling glass sliding door system commercial
- Low-E triple-glazed glass panels argon-filled
- Minimal aluminum mullion frame white powder-coat
- Polished concrete floor sealer high-gloss
- White modern sofa sectional modular
- Glass and steel dining table minimalist
- Potted fiddle leaf fig tree 5-foot
- Pendant light fixtures brass geometric
- White linen throw pillow covers set
- Neutral area rug wool 9×12
4. Corten Steel Weathering — Embracing Natural Patina

Vibe: Raw and honestly aged, where time is visible and beautiful.
Why it works: Corten steel (also called weathering steel) develops a protective oxide layer that stops rust from penetrating deeper—the patina is both beautiful and functional. Rather than fighting oxidation, embracing it signals acceptance of materials in their authentic state. The varying rust tones (orange to deep brown) create subtle color depth that painted surfaces cannot match.
How to get it: Specify bare corten steel containers rather than new (less expensive anyway at $2,500–$3,500 used). Seal only if aesthetics require uniform finish; unsealed corten will weather naturally over 3–5 years. If accelerating patina is desired, use a ferric chloride solution applied monthly until desired color achieved. Once mature, corten requires no maintenance.
How to get it: Ensure drainage is excellent around the container base—pooling water accelerates rust in an uncontrolled way. Install gutters and gravel drainage to direct water away from the foundation, controlling the rust development pattern.
Shop The Look
- Used 40-foot corten steel shipping container
- Ferric chloride patina accelerator solution
- Clear sealant matte finish corten optional
- Weathering steel planter box large
- Black metal gutter system rust-compatible
- Gravel drainage layer pea gravel
- Potted black succulent ceramic pot
- Weathering steel bench accent seating
- Steel and concrete step treads
- Minimal landscape bark mulch native
5. Split-Level Interior — Loft Sleeping Above Kitchen

Vibe: Organized and layered, where vertical thinking doubles living capacity.
Why it works: The loft solves the container’s primary constraint—ceiling height—by using overhead space for sleeping while keeping common areas (kitchen, living) at full height. A suspended sleeping platform creates visual separation without walls, maintaining the open-plan aesthetic while allowing privacy. The staircase becomes architectural detail rather than utilitarian necessity.
How to get it: Frame the loft from structural steel I-beams bolted to the container’s interior corners. Use 2×10 pressure-treated joists for support, 3/4-inch plywood for the deck, 2×6 wooden treads on open-riser steel stringers. Loft size: 12 ft × 15 ft = 180 sq ft sleeping area, leaving 140 sq ft below for living/kitchen. Total cost: $4,000–$7,000 including materials and labor.
💡 Quick Win: Use cable railings instead of solid rails around the loft—they cost $200 less and keep sightlines open so the space doesn’t feel cramped from below.
Shop The Look
- Structural steel I-beam interior frame kit
- Pressure-treated 2×10 joists loft framing
- 3/4-inch plywood subfloor loft deck
- Steel staircase open-riser industrial
- Solid wood stair treads oak or walnut
- Cable railing system minimalist
- Skylight roof opening kit 3×4
- Metal ceiling hooks hanging storage
- Loft platform storage drawers underneath
- Blackout curtain panels skylights white
6. Concrete Floor with Radiant Heating — Thermal Mass

Vibe: Grounded and warm, where substantial materials hold heat and history.
Why it works: Polished concrete becomes primary aesthetic element rather than utilitarian substrate. Radiant floor heating (water tubing embedded in the concrete before pouring) eliminates visible heaters and distributes warmth evenly—a luxury typically associated with high-end residential, now achievable in compact container spaces. The exposed aggregate (pebbles, quartz) visible in the polish adds texture and visual interest while functional thermal mass regulates interior temperature naturally.
How to get it: Install PEX tubing (flexible plastic water lines) on the container’s steel floor in a serpentine pattern before pouring concrete. Pour 3–4 inches of structural concrete mixed with decorative aggregate. Once cured, polish to desired sheen (matte, satin, or high-gloss). Connect radiant lines to a small boiler or heat pump outside. Cost: $8–12/sq ft for the complete system. For a 320-sq-ft container: $2,560–$3,840 material and labor.
How to get it: Specify a light-toned concrete (cream, pale gray, or white-washed finish) to maximize light reflection and maintain the sense of openness in a compact space.
Shop The Look
- PEX radiant heating tubing complete system kit
- Structural concrete mix decorative aggregate
- Concrete polisher rental or contractor service
- Concrete sealer matte finish food-safe
- Radiant floor thermostat programmable
- Wool area rug 8×10 neutral warm tone
- Furniture with low profiles minimal visual weight
- Baseboards white or natural wood trim
- Potted green plant 3-foot fiddle leaf
- Textured throw pillow covers organic linen
7. Industrial Windows Pattern — Strategic Cutouts

Vibe: Geometric and intentional, where opening become grid and pattern becomes rhythm.
Why it works: Strategic window placement creates visual interest on a blank steel surface while controlling interior light and privacy. A grid pattern of identical-sized windows (2×2 ft squares spaced 3 feet apart) creates architectural repetition that reads as design intent rather than arbitrary cutting. The pattern can be staggered across multiple stacked containers to create rhythm without symmetry—more dynamic than a regular grid.
How to get it: Mark window positions with chalk first; use a reciprocating saw with a metal blade to cut precise openings. Frame each opening with steel angle iron (1.5×1.5 inch) bolted to the container’s frame. Install fixed or operable windows (aluminum frames, clear or tinted glass). Each window: materials $250–400, labor $150–250. For 9 windows: $3,600–$5,850 total.
💡 Quick Win: Don’t match window sizes to the interior room layout—let them stagger across the building envelope for visual complexity and unexpected interior light patterns that make the space feel thoughtfully designed.
Shop The Look
- Steel angle iron frame kit window
- Reciprocating saw metal-cutting blade
- Aluminum window frames fixed pane
- Clear tempered glass panes 24×24
- Deep matte black window paint exterior
- Heavy-duty bolts stainless steel hardware
- Caulk sealant weatherproof aluminum-compatible
- Interior window sill trim wood or metal
- Window shades blackout roller minimal
- Steel mounting hardware hinges if operable
8. Integrated Outdoor Deck — Steel Frame Extension

Vibe: Extended and livable, where indoor-outdoor boundaries soften.
Why it works: A steel-frame deck solves the container’s isolation—it creates a transitional zone between sealed interior and landscape. Using the same materials (weathering steel, visible fasteners) as the container ensures visual coherence. The deck doubles usable living area, offering outdoor seating, dining, and workspace. Structurally, the deck transfers its load to concrete pillar supports rather than the container, avoiding foundation compromise.
How to get it: Design a deck measuring 12–20 feet long (extending from the container’s side) and 10–14 feet wide, supported by 4 steel posts (6×6 inch tube steel) sitting on 24-inch-deep concrete footings. Use 3-inch steel I-beams as primary structure, composite decking boards for weather-resistance. Staircase: 3–4 steps with steel stringers and solid treads. Budget: $6,000–$12,000 including materials, design, and installation.
How to get it: Specify composite decking (wood-plastic blend) in a warm gray to complement the rust patina of the container—it requires no staining and resists rot for 25+ years.
Shop The Look
- Structural steel I-beam deck frame kit
- Steel post supports 6×6 tube steel
- Composite decking boards gray 12-foot
- Steel staircase stringers open riser
- Solid wood stair treads pressure-treated
- Metal railing system minimalist cable
- Deck fastener kit stainless steel bolts
- Concrete footer mix post supports
- Climbing plant trellis system steel
- Lounge furniture outdoor gray/white
9. Minimalist Interior Layout — Three-Zone Open Plan

Vibe: Open and intentional, where arrangement becomes architecture.
Why it works: A container’s lack of walls becomes strength when zones are defined by furniture placement and area rugs rather than drywall. This approach borrows from Japanese spatial design (ma—the meaningful use of emptiness). Each zone has visual boundaries but sightlines flow continuously, making the compact space feel larger. The sleeping platform elevated 12–18 inches creates subtle separation without visual obstruction.
How to get it: Arrange one modest area rug (5×7 ft) under a seating zone, another (4×6 ft) under the dining table, and keep the sleeping platform on bare concrete. Use consistent furniture height (30–36 inches for tables/seating) to maintain visual rhythm. Select one accent color (sage, dusty blue, warm cream) and layer it through textiles only—keep furniture frames natural wood or painted white.
How to get it: Position the kitchen along the wall nearest utilities, the sleeping platform in the corner furthest from the entry door (natural privacy through location rather than barriers), and dining/seating in the visual center—this arrangement maximizes flow and prevents any zone from feeling cramped.
Shop The Look
- Low-profile wooden bed frame minimalist
- 5×7 neutral wool area rug cream
- 4×6 dining area rug natural fiber
- Simple wooden dining table 4-seat
- White modern dining chairs 4-pack
- Stainless steel kitchen countertop
- Minimal kitchen shelving open storage
- Single potted ficus tree 4-foot
- White linen bedding set minimal
- Pendant light fixture brass single
10. Rooftop Integration — Green Space on Roof

Vibe: Productive and grounded, where living grows from the top down.
Why it works: A rooftop garden transforms wasted space into productive landscape while providing insulation (soil and plants regulate temperature). The visual effect—containers topped with living growth—softens the industrial form. Functionally, growing herbs and vegetables steps living toward self-sufficiency; psychologically, tending plants daily creates sense of agency and place-making.
How to get it: Create a raised bed frame from pressure-treated 2×8 lumber, 4 feet × 8 feet × 12 inches deep, set directly on the container roof. Use a root barrier membrane to prevent soil moisture from reaching steel. Fill with quality planting mix. Install a drip irrigation system connected to a timer—this requires water access (from a rainwater tank or hose connection). Budget: $1,200–$2,000 for bed framing, irrigation, and initial plants.
💡 Quick Win: Plant perennial herbs (rosemary, sage, thyme) that require minimal maintenance—one spring planting yields five years of harvests without annual replanting.
Shop The Look
- Raised garden bed frame wood pressure-treated
- Root barrier membrane heavy-duty
- Landscape soil growing mix bulk
- Drip irrigation system timer-ready
- Potted herb plants culinary herbs
- Perennial flowering plants native
- Wooden planter boxes various sizes
- Garden seating two Adirondack chairs
- Small metal side table weathering steel
- Decorative gravel mulch garden
11. Oversized Roll-Up Door — Dual Entry/Privacy Variation

Vibe: Dynamic and transformable, where walls become negotiable boundaries.
Why it works: The shipping container’s original cargo door—typically a 7’6″ × 7’6″ solid or partially solid structure—can be left intact and fully functional. Rolling it open converts the entire 1,600-square-foot side into a threshold, collapsing interior-exterior separation. Closed, it provides security and thermal control. The mechanism is industrial-honest, celebrating the container’s original function rather than disguising it. This works best in secure locations (private land, not street-facing).
How to get it: Restore the original container door if present, or commission a custom aluminum roll-up door. Ensure the door system is well-maintained (oil tracks quarterly) for smooth operation. Paint interior surfaces of door to match interior walls so the open threshold feels intentional, not like exposed container edge. Cost: $800–$2,000 for restoration or custom door.
How to get it: Install interior roller shade or curtain rod inside the doorway—when guests arrive or evening falls, a simple shade provides privacy without the visual weight of the solid door closing.
Shop The Look
- Shipping container roll-up door restoration kit
- Heavy-duty door track lubricant maintenance
- Interior roller shade kit blackout optional
- Curtain rod industrial black metal
- Blackout curtain panel set solid color
- Weather stripping door insulation
- Interior door trim casing white or natural
- Exterior lighting fixtures floodlight
- Door hardware handles pull rings
- Threshold ramp metal slope for accessibility
12. Warm White Interior Walls — Contrast with Steel Frame

Vibe: Clean and bright, where industrial bones show through honest walls.
Why it works: Painting interior walls a warm white (not cool white, which reads sterile) creates softness while exposed steel framing remains visible—a design strategy that’s simultaneously minimalist and brutalist. The contrast between soft white and dark steel creates visual depth and emphasizes the container’s structural logic. This approach avoids the “we’re hiding the container” mistake while maintaining livability and light.
How to get it: Specify warm white paint (Benjamin Moore Swiss Coffee, Sherwin-Williams Alabaster, or similar 95+ LRV—light reflectance value—paint). Paint directly onto steel surfaces (use rust-inhibiting primer first). Leave seams, bolt patterns, and frame lines unpainted to celebrate the industrial structure. This requires only 400–800 square feet of paint for a single container—budget $300–$600 material and labor.
How to get it: Install white or cream-colored acoustic panels in strategic locations (above kitchen areas, near entry) to control sound without visually cluttering the space—containers are acoustically live, and soft materials absorb noise.
Shop The Look
- Warm white interior paint primer-included
- Rust-inhibiting metal primer stainless
- Paint roller kit ceiling and walls
- Brushes various sizes detail work
- Interior acoustic panels sound-absorbing
- Ceiling-mounted track lighting minimalist
- White linen wall tapestry large
- Light wood floating shelves open storage
- Picture rail hanging system white
- Minimal framed artwork landscape print
13. Stacked Containers — Vertical Expansion with Bridge

Vibe: Ambitious and structured, where vertical living creates height without sprawl.
Why it works: Stacking containers doubles square footage while maintaining a small footprint—critical for rural properties with limited usable land. The bridge (glass-enclosed for visibility and weather protection) becomes architectural feature connecting upper and lower levels visually and functionally. Structurally, the lower container bears all weight, while the upper container rests on a steel frame bolted to the lower container’s top edge and corners.
How to get it: Hire an engineer to design the stacking frame and bridge system; containers require structural reinforcement at connection points. The lower container sits on concrete piers 24 inches deep. The upper container’s weight (roughly 8 tons empty) transfers through steel corner posts into the lower container’s frame. The bridge: glass-walled (for light and view) with steel frame, 4–6 feet long, 4–5 feet wide. Budget: $15,000–$25,000 for engineering, stacking frame, and bridge (separate from container interior finishing).
💡 Quick Win: Use the upper container as sleeping/private zone and lower as living/kitchen/common—this natural stacking matches human behavior and creates psychological separation without interior walls.
Shop The Look
- Structural steel stacking frame kit engineered
- Concrete pier forms and footer mix
- Glass-enclosed bridge frame kit prefab
- Tempered safety glass panels bridge
- Exterior steel staircase open riser
- Stair treads solid wood pressure-treated
- Safety railing cable system minimalist
- Roofing material for upper container
- Waterproofing sealant bridge-container joints
- Landing platform steel expanded mesh
14. Industrial Plumbing as Art — Exposed Pipes and Fixtures

Vibe: Raw and honest, where infrastructure becomes art.
Why it works: In a minimal space, hiding plumbing behind walls wastes precious square footage and defeats industrial honesty. Running supply lines visibly—in large-diameter black steel, not thin plastic pipes—celebrates infrastructure as design. Brass or copper fittings add warmth and detail; they’re functional but beautiful. This approach requires thoughtful routing (parallel lines, consistent spacing, organized pattern) but eliminates the need for bulkheads and walls that shrink the perceived space.
How to get it: Use 1.5–2 inch black steel pipe for hot and cold water supply (thicker than typical 1/2″ plastic—it looks intentional and robust). Route pipes in parallel, spacing them 2–3 inches apart, securing with black metal pipe clamps every 3 feet. Use brass ball valves at key junctions (kitchen, bathrooms) for visual interest. Cost: $1,200–$1,800 for a complete plumbing system in a single container, similar to hidden plumbing but with better visual outcome.
How to get it: When painting walls, use a warm off-white—the contrast with dark pipes prevents the industrial elements from feeling cold or harsh.
Shop The Look
- Black steel pipe and fittings 1.5-inch
- Brass ball valves shut-off 1.5-inch
- Black steel pipe clamps mounting hardware
- Vintage pedestal sink white ceramic
- Brass faucet wall-mount industrial
- Brass supply line connections
- Copper supply line flexible 1/2-inch
- Pipe supports wall-mounted brackets
- Off-white interior paint warm tone
- Minimalist mirror medicine cabinet optional
15. Skylight Punctuation — Single Large Opening

Vibe: Luminous and meditative, where light becomes architecture.
Why it works: A single substantial skylight (4 feet × 5 feet is generous for a 320-sq-ft container) provides bright overhead light, visual connection to sky, and a sense of volume that small windows cannot achieve. Positioned at the container’s apex, it becomes visual anchor and architectural statement. The skylight’s dramatic effect—a column of light moving across the floor throughout the day—creates a changing interior landscape.
How to get it: Specify a curb-mounted, triple-glazed skylight system with aluminum frame (brown or black to match container aesthetic). The framing work: cut a hole through the steel roof, install a wooden curb around the opening, set the skylight unit into the curb, seal with weatherproof flashing. Cost: $1,500–$3,000 installed, including framing and sealing.
How to get it: If south-facing and the climate is hot, specify a skylight with a manual or motorized shade mechanism—even one window of bright, unobstructed light can overheat a compact container. Shades provide control without visual obstruction.
Shop The Look
- Curb-mount skylight triple-glazed 4×5
- Aluminum skylight frame matte black
- Roof flashing waterproof aluminum
- Wooden skylight curb framing kit
- Motorized skylight shade optional
- Interior trim casing around skylight
- Pendant light fixture below (secondary)
- Plant stand positioning skylight zone
- Potted ficus or similar tall plant
- Light diffuser scrim optional for glare
16. Modular Furniture — Reconfigurable Interior

Vibe: Flexible and intentional, where arrangement evolves with needs.
Why it works: Shipping container living is temporary by nature—whether actually (if it’s on rental land) or psychologically (the aesthetic suggests impermanence). Modular furniture honors this reality, allowing spaces to transform as needs change. A sectional composed of 4–5 independent cushions can become a sleeping platform, seating area, or lounging expanse. The psychological benefit: ownership without commitment, flexibility without waste.
How to get it: Invest in modular systems from brands like Muuto, HAY, or Hay Design that offer reconfigurable elements. Or DIY using cushions of uniform size (20×20 inches) with metal frames, creating a system that’s completely reconfigurable. Budget: $800–$1,500 for a modest modular seating system for a container home.
💡 Quick Win: Buy modular storage cubes (IKEA’s Kallax, MUJI’s wooden modular units, or similar) and stack them in different configurations—this provides visual interest while keeping everything mobile.
Shop The Look
- Modular sectional cushioned elements
- Caster wheels heavy-duty furniture wheels
- Stacking storage cubes open system
- Dining surface on casters mobile
- Modular wooden shelving open frame
- Neutral throw pillow covers multiple
- Wood storage boxes nesting sizes
- Lightweight side tables mobile
- Potted plant on wheeled plant stand
- Cable management system open space
17. Warm Wood Accents — Cedar or Walnut Interior Trim

Vibe: Warm and grounded, where wood humanizes steel and creates soul.
Why it works: Industrial spaces need warmth to feel livable; wood provides that warmth immediately. Rather than random wooden accessories, strategic wood elements—a full accent wall, ceiling beams, shelving, or kitchen island—become architectural features that justify their presence. Walnut or cedar chosen for authentic patina (not pretense) signals careful curation.
How to get it: Select one accent wall (typically the wall opposite the primary entry or viewing angle) and cover it with 1×8 or 1×10 reclaimed walnut or cedar boards, stacked horizontally or vertically. Or install a single row of wooden ceiling beams (structural or purely visual) running the container’s length. Cost: $1,500–$3,000 for one full accent wall, $400–$800 for ceiling beams.
How to get it: Specify rough-sawn wood (visible surface irregularity) rather than planed-smooth wood—rough surfaces feel authentic and show grain variation more dramatically than perfectly flat lumber.
Shop The Look
- Rough-sawn walnut or cedar boards 1×8
- Wood accents wall finish lumber
- Wooden ceiling beam structural
- Wood shelving floating wall-mounted
- Wooden kitchen island countertop
- Wood frame door or sliding door
- Window trim casing natural wood
- Wood stain if required matching undertone
- Wooden furniture simple dining table
- Natural wood geometric wall art
18. Mezzanine Level — Half-Container Second Story

Vibe: Layered and efficient, where vertical thinking creates multiple living zones.
Why it works: A mezzanine (half-container second story) solves two container constraints simultaneously: insufficient ceiling height and limited floor area. The mezzanine provides a sleeping zone with 5–6 feet of headroom (tight but functional for sleeping, not moving around), while keeping the space below at full ceiling height for living. Structurally, the mezzanine’s load transfers to the container’s steel frame corners, distributing weight evenly.
How to get it: Design a 12-foot × 20-foot mezzanine suspended at 6 feet using steel I-beams running across the container width, supported at corners and mid-span by 3×3-inch steel posts. Use 2×10 joists at 12-inch spacing, 3/4-inch plywood subfloor. Build a 3–4 step staircase with open risers to maintain sightlines. Budget: $5,000–$8,000 including structural steel, framing, and labor.
How to get it: Specify the mezzanine’s edge as a cable railing (not a solid barrier)—cables are virtually invisible, so the upper space doesn’t feel enclosed. This maintains the visual openness while meeting safety codes.
Shop The Look
- Structural steel I-beam mezzanine frame
- Steel posts 3×3 support columns
- 2×10 pressure-treated joists
- 3/4-inch plywood subfloor mezzanine
- Cable railing system mezzanine edge
- Steel staircase open riser
- Solid wood stair treads
- Mezzanine edge lighting strip LED optional
- Mattress platform memory foam
- White bedding minimal set
19. Exterior Cladding with Ventilation — Metal or Wood Mesh

Vibe: Layered and breathing, where surface becomes system.
Why it works: Ventilated cladding (also called a “double skin”) solves two technical problems: temperature regulation and condensation prevention. The air gap between the mesh/louver cladding and the container’s steel surface allows heat to dissipate in summer and prevents condensation buildup in winter. Aesthetically, the layering creates visual depth and shadow play that transforms the blank container surface. The cladding can open and close based on weather—fully open for ventilation, partially screening with louvers, fully closed for privacy.
How to get it: Install horizontal metal louvers (aluminum or steel) on 2×4 pressure-treated furring strips spaced 6 inches away from the container wall. Space louvers at 4–6-inch intervals vertically. Or use expanded metal mesh in a large-format diamond pattern (dimensions 1 inch diamond, rough texture). Cost: $4,000–$8,000 for a complete container exterior, depending on material choice and installation.
How to get it: Choose material that weathers beautifully—aluminum bronze or copper mesh develops a rich patina; steel develops warm rust tones; wood louvers gray naturally. Avoid materials that require staining or finish maintenance.
Shop The Look
- Expanded metal mesh aluminum or steel
- Metal louver horizontal slats aluminum
- Pressure-treated 2×4 furring strips
- Stainless steel fasteners hardware
- Wood louvers horizontal cedar optional
- Mounting brackets hardware grid system
- Metal gutter and downspout system
- Flashing weatherproofing mesh edges
- Fastener washers load-distribution
- Sealant waterproof compatible
20. Compact Kitchen Island — Galley-Style Workspace

Vibe: Efficient and social, where cooking space becomes gathering space.
Why it works: A container kitchen has no choice but to be galley-style (linear, two-wall configuration). Adding a compact central island in the middle creates social function without compromising workflow. The island provides additional counter space, storage, and seating—three necessities in 320 square feet. Functionally, bar-height seating (36 inches) separates the cooking zone from living areas while allowing sight-lines and conversation during cooking.
How to get it: Build or purchase a 3×5-foot island with a 3-4-inch overhang for bar seating. Support is critical: secure the island to the polished concrete floor with bolts or steel angles anchored into the floor (allows for future removal without permanent damage). Top with stainless steel for durability and industrial honesty. Budget: $1,500–$2,500 for a custom-built island; $800–$1,200 for a prefab model.
💡 Quick Win: Use a portable induction cooktop on the island rather than a built-in range—induction is efficient, safe, and removable if you relocate. Cost: $200–$400 for a quality model.
Shop The Look
- Kitchen island base cabinet with open shelving
- Stainless steel countertop island finish
- Portable induction cooktop 2-burner
- Bar seating bar stools counter height 2–3
- Pendant light fixtures above island 2–3
- Open shelving baskets storage
- Wall-mounted utensil rail and hooks
- Potted herb plant window-sill kitchen
- Stainless steel cookware hanging
- Minimalist kitchen artwork one piece
21. Natural Light Layering — Multiple Window Types

Vibe: Bright and varied, where light becomes the primary material.
Why it works: Containers have severely limited existing light (only door openings and roof access). Strategic multiple windows solve darkness while creating visual interest. A combination of large picture windows (for views and volume light), smaller square windows (for privacy and architectural detail), and high clerestory windows (for diffused overhead light without glare) creates a sophisticated lighting design. The variation prevents the monotony of a single light source.
How to get it: Start with one large picture window (4×6 feet) positioned for views—this is the primary light and connection to landscape. Add 4–6 smaller windows (2×2 or 2×3 feet) cut at varying heights for secondary light and visual rhythm. Consider a clerestory window (operable, high on the wall) for ventilation and diffused light without direct sun. Total cost: $3,000–$6,000 for five window installations.
How to get it: Install manual roller shades inside each window—this allows light control without blocking views. In a small space, the ability to dim afternoon sun without closing heavy curtains maintains the sense of openness.
Shop The Look
- Large picture window 4×6 fixed pane
- Square operable window 2×2 aluminum frame
- Clerestory window kit high wall installation
- Skylights curb-mounted various sizes
- Roller shade kit blackout interior
- Shade hardware minimal profile
- Window trim casing natural finish
- Weather stripping gaskets all windows
- Interior window sill shelving
- Window treatment fabric optional
22. Outdoor Shower Structure — Steel Frame Enclosure

Vibe: Open and authentic, where bathing becomes landscape ritual.
Why it works: An outdoor shower becomes pure indulgence in a container home—hot water, open sky, landscape experience. Steel-frame construction with partial screening (one wall) maintains the container home’s honest material language while creating functional privacy. The open sides prevent the experience from feeling enclosed; bathing becomes a full-sensory landscape interaction.
How to get it: Build a 4×4-foot enclosure from 1-inch steel tubing welded or bolted together, mounted on concrete piers. One wall: horizontal cedar slats or weathering steel mesh spaced for privacy without blocking sightlines. Remaining walls: open air. Flooring: wooden deck boards laid over a gravel base for drainage. Plumbing: connect a water heater (propane or electric) to a simple showerhead mounted on the frame. Cost: $2,500–$4,500 including framing, decking, and plumbing.
How to get it: Position the shower where morning or late-afternoon sun hits it—cold-water showers are pleasant in summer; warm sun on the structure during cooler seasons. Also position away from prevailing wind if possible.
Shop The Look
- Steel tubing frame 1-inch structural
- Welding bolts fasteners structural
- Wooden deck boards pressure-treated
- Showerhead wall-mounted brushed brass
- Water heater outdoor propane small
- Plumbing supply tubing PEX or copper
- Wooden slat screening cedar horizontal
- Concrete piers footer supports
- Gravel drainage base pea gravel
- Simple wooden bench for seating
23. Interior Dividing Wall — Partial Height Steel Partition

Vibe: Divided yet open, where partial walls create zones without enclosure.
Why it works: A full wall dividing a container is wasteful and isolating. A partial-height dividing wall (5–6 feet tall) solves privacy needs for sleeping while maintaining visual connection and light flow. The open space above the wall becomes light and sightline conduit. The wall itself becomes design statement using consistent material language (steel frame, wood slats matching the container’s aesthetic).
How to get it: Frame the wall from 1×2-inch steel tubing welded or bolted into a U-shape anchored to floor and neighboring walls (not bolted to the container itself, which allows future removal). Infill with 1×4 reclaimed wood slats spaced 1/4 inch apart or solid depending on privacy preference. Height: 5 feet allows sight-lines and light to flow freely. Cost: $1,500–$2,500 including materials and labor.
💡 Quick Win: Use black-painted steel for the frame—this matches the container’s edges and hardware, making the partition feel intentional rather than temporary.
Shop The Look
- Steel tubing frame 1×2-inch structural
- Welding bolts fasteners installation
- Reclaimed wood slats 1×4 horizontal
- Wood stain or paint if required
- Black paint exterior-grade steel frame
- Concrete floor bolts anchors
- Hardware hinges if wall will be removable
- Wood slat spacing template or measurement
- Minimal shelving one side partition-mounted
- Decorative elements none—partition is focus
24. Efficient Bathroom Layout — Wet-Shower Focus

Vibe: Clean and efficient, where necessity creates elegance.
Why it works: Bathroom space is premium in a 320-square-foot container. A wet-shower approach (shower zone with sloped floor and central drain) eliminates the space-hungry bathtub while maximizing usable floor area. A wall-mounted toilet and sink free floor space, making the room feel larger. Polished concrete flooring (sloped at 1/8 inch per foot toward the drain) handles water without requiring a separate shower enclosure with walls.
How to get it: Design the bathroom in a corner, 8×8 feet minimum. Position the shower in one corner with a sloped concrete floor directing water to a central floor drain. Wall-mount the toilet and sink along the opposite wall. Finish walls with waterproof drywall or tile. Specify stainless steel fixtures to match the container aesthetic. Cost: $4,000–$6,000 for a compact, fully functional bathroom including plumbing, fixtures, and finishing.
How to get it: Install a window high on the wall (near ceiling) to prevent moisture issues and provide natural light without compromising privacy at eye level.
Shop The Look
- Sloped concrete bathroom floor system
- Floor drain centered stainless steel
- Wall-mounted toilet compact
- Wall-mounted sink stainless steel
- Showerhead brushed steel minimalist
- Waterproof drywall or tile walls
- Recessed lighting fixtures waterproof
- High window bathroom privacy
- Minimal hardware towel bar
- Drainage system sloped subfloor
25. Green Screen Boundary — Living Wall for Privacy

Vibe: Verdant and protective, where walls become living breathing entities.
Why it works: A living wall transforms the container’s harsh exterior, softens its industrial form, and provides environmental benefits (improved air quality, temperature regulation, habitat). Psychologically, living plants create a sense of care and growth. Practically, the green density provides privacy from neighbors while reducing wind exposure on exposed sides. The plants’ insulating properties reduce cooling costs during hot seasons.
How to get it: Install a modular vertical garden system (brands like Florafelt or custom steel frames) on the container’s exterior. Mount planter boxes in a grid pattern, infill with lightweight potting mix, and plant with trailing or cascading plants (sedums, creeping fig, ivy, grasses). Attach a simple drip irrigation system connected to a timer and water source. Maintenance: monthly check-in to ensure drainage and remove dead plants. Cost: $3,000–$6,000 including system, installation, and initial planting.
How to get it: Water the living wall early morning to minimize evaporation and prevent afternoon sun from stressing the plants during peak heat.
Shop The Look
- Modular vertical garden planter boxes
- Steel frame living wall system
- Lightweight potting mix plantings
- Drip irrigation system complete
- Timer for irrigation automated
- Climbing or trailing plants sedums ivy
- Cascading ornamental grasses
- Flowering plants color accents
- Plant supports clips hardware
- Fertilizer slow-release plant nutrition
26. Interior Finishing Philosophy — Raw Materials Vs. Polished Surfaces

Vibe: Intentional and personal, where material choices reflect life philosophy.
Why it works: There’s no “right” way to finish a container—the choice between raw industrial (bare steel, exposed systems) and refined warmth (paint, polish, finished surfaces) is deeply personal and should match the inhabitant’s tolerance for industrial aesthetics, maintenance, and desire for comfort. Some people love seeing structure; others need softness. This final idea honors both paths and validates the decision-making process itself.
How to get it: Before committing to finishes, live in the space raw for a few weeks if possible. Notice which elements you want to soften (cold steel frame, acoustic noise, harsh finishes) and which you want to celebrate (structure, authenticity, materials history). Then selectively finish only what enhances livability without compromising the aesthetic integrity you value.
How to get it: There’s a middle ground: paint walls warm white and leave the frame exposed, or seal concrete and leave some steel raw. The goal is a space that feels intentional, not a compromise where half-measures make everything feel uncertain. Commit to your philosophy fully, even if that philosophy changes—spaces are living documents.
Shop The Look
- Warm white paint interior finish walls
- Matte finish if embracing raw-texture aesthetic
- Concrete sealer polished finish optional
- Paint brush roller tools application
- Primer rust-inhibiting if painting steel
- Fabric wall tapestry for softness
- Throw pillows and textiles warmth
- Lighting fixtures to complement finish choice
- Baskets or storage to manage visual noise
- Statement art one piece reflecting philosophy
How to Start Your Shipping Container Homes Transformation
THE ONE FIRST MOVE: Specify your window plan before anything else. Containers are inherently dark—a single large picture window (4×6 feet) positioned for views costs $800–$1,500 and transforms the interior from bunker to bright livable space. Without addressing light first, you’ll spend months finishing an interior you hate. Choose the window position based on the best outdoor view or natural light direction, and plan every other design choice around the light that window creates.
THE MOST COMMON MISTAKE: Underestimating the visual weight of the exposed steel frame. Many first-time container builders leave the interior steel completely exposed (bare bolts, unfinished seams, painted only where required), expecting it to read as “industrial cool.” Instead, it reads as unfinished or abandoned. The solution: paint the steel-frame a warm white or soft gray—this doesn’t hide the frame’s presence; it lets you see its geometry clearly without the visual harshness of bare metal. Alternatively, commit fully to raw industrial and pair it with high-quality finishing elsewhere (polished concrete, warm wood, sophisticated lighting) to create intentional contrast.
BUDGET ENTRY POINTS UNDER $50: (1) A single large potted plant (fiddle leaf fig, 4–5 feet tall, $30–$40)—places it in a corner where sunlight from a window hits it; this single living element transforms a raw space into a home. (2) Linen fabric curtain rod ($20–$30) hung across a window with soft cream linen panels—this defines the window zone and softens the industrial glass without blocking light. (3) A woven area rug (5×7 feet, jute or natural fiber, $40–$50)—defines a seating zone and adds texture to bare concrete.
REALISTIC EXPECTATIONS: A basic shipping container shell (40-foot container delivered to site: $3,500–$5,000) plus fundamental improvements (one window, bathroom fixtures, kitchen appliances, insulation, flooring, paint: $25,000–$40,000) brings you to livable status in 4–6 months with professional help or 8–12 months DIY. A fully finished container home with multiple windows, premium materials, custom furniture, and landscape integration: $60,000–$100,000+ and 6–12 months depending on complexity. The smallest, fastest version: a single container with minimal finishes (basic bathroom, kitchen, sleeping area, one window, paint only) costs $15,000–$20,000 and achieves livability in 8–10 weeks.
Frequently Asked Questions About Shipping Container Homes
What’s the difference between a shipping container home and a tiny home or RV? A shipping container home is a permanent or semi-permanent structure built from reclaimed or new cargo containers (40 feet × 8 feet × 8’6″—320 sq ft for a single unit), typically anchored on a permanent foundation and connected to utilities. Tiny homes are similarly compact (usually 300–500 sq ft) but built from traditional framing, not containers. RVs are mobile and temporary. Container homes sit between the other two: more permanent and space-efficient than an RV, more sustainable and affordable than a traditional tiny home.
Can you make a container home truly warm and livable, or does it always feel industrial? Container homes feel as warm or industrial as their finishes dictate. A space painted warm white with wood accents, soft textiles, and good lighting reads as cozy. The same container left bare steel reads industrial. The material honesty of a container (you can see its structure and systems) doesn’t require a cold aesthetic—warmth comes from paint colors, wood elements, lighting design, and textiles, just like any interior. The “industrial” feeling comes from choice, not necessity.
How much does it actually cost to build a basic shipping container home from start to finish? A realistic budget: container delivery ($1,500–$3,000), site prep and foundation ($3,000–$6,000), insulation ($2,000–$4,000), electrical and plumbing ($5,000–$10,000), windows and doors ($3,000–$6,000), bathroom and kitchen fixtures ($4,000–$8,000), interior finishes including paint and flooring ($3,000–$6,000), permitting and inspections ($1,500–$3,000). Total: $23,000–$46,000 for a livable single-container home. This assumes no custom design or premium materials. Costs double for multi-container homes, professional architectural design, or custom features.
Can container homes be financed or insured like traditional homes? Financing and insurance for container homes are increasingly available but more complex than traditional mortgages. Some banks now offer construction loans for container homes; insurance is available through specialized providers. Challenges: lenders want traditional construction; some jurisdictions still lack zoning allowances for container homes. Solution: research local zoning codes first (many rural areas permit containers; urban areas often don’t), connect with a lender experienced in alternative construction, and budget 3–6 months for permitting and financing approval.
What’s the best climate for a container home without expensive HVAC systems? Container homes work best in moderate climates (50–75°F year-round) with low humidity. In hot climates, insulation and high-performance windows are essential; in cold climates, radiant floor heating or high-efficiency heat pumps are necessary. Desert climates (Arizona, New Mexico) are ideal: low humidity, predictable sunshine, and thermal mass in the concrete floor naturally regulates temperature. Tropical or humid climates require aggressive moisture control (proper ventilation, dehumidifiers). Extreme cold climates require professional design and high-end heating solutions, making container homes less cost-effective than traditional construction.
Ready to Create Your Dream Shipping Container Homes?
You now have 26 specific ideas spanning color treatments, material strategies, spatial solutions, technical systems, and philosophical approaches to shipping container living. Whether you’re drawn to the raw industrial honesty, the sustainable reuse narrative, the compact efficiency, or the unique aesthetic, there’s a container home approach here that matches your vision.
Transformation doesn’t require a complete overhaul before moving in—it builds incrementally. Start with the one foundational element (choose your window positioning, commit to a color story, or install one accent wall), then layer additional ideas as time and budget allow. Container homes reward this iterative approach; they’re inherently flexible enough to evolve as your needs change and your vision clarifies.
Your one concrete action for today: If you’re seriously considering container living, spend 30 minutes sketching a basic floor plan of a 40-foot container (40 feet long, 8 feet wide, 8.5 feet tall interior). Mark where windows would go for morning light, where sleeping would happen, where cooking would occupy space. This simple exercise clarifies whether a single container works for your life or if you need stacked or adjacent units. Share this sketch with a local architect or engineer—one conversation costs $150–$300 and prevents costly design mistakes.
Once finished, your container home will feel like exactly what it is: a deliberate choice to live with intention in a space where every square foot serves purpose, where materials show their age honestly, and where industrial bones become the foundation of genuine, grounded home.
Save the ideas that speak to you—the window patterns you love, the color stories that resonate, the layout solutions that match your rhythm. Your specific container home is unique to your vision. Pin the ones that spark something, and build from there.